Overview
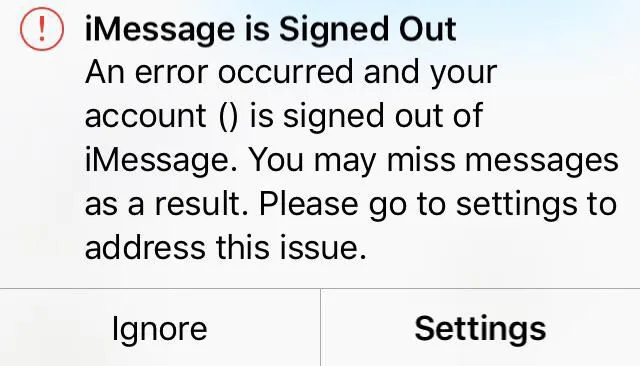
Have you ever faced the frustrating situation of encountering an error message stating “iMessage is Signed Out” on your iPhone while trying to send a message through the iMessage app? If so, you know how inconvenient it can be, preventing you from sending any messages until you sign in again.
We understand the urgency of resolving this issue and want to guide you through a quick solution. Despite being logged out of your iMessage account, you can still send and receive regular text messages without any disruptions.

This communication barrier can be quite vexing, but there’s a possibility that the problem is linked to your Apple ID. One potential fix is to remove the SIM card from your phone and let it sit for a short while. This simple step might just be the key to restoring your iMessage functionality.
Rest assured, with a little patience and these troubleshooting steps, you’ll be back to seamless messaging in no time. Don’t let the “iMessage is Signed Out” error hold you back from staying connected with your contacts.
Today, in this article you will get to know How this problem can be fixed?
Reasons for receiving an iMessage signed-out error
Experiencing frequent iMessage sign-out issues on your iPhone can be frustrating, but it’s not always tied to your Apple ID. Incorrect iMessage settings, software bugs, network problems, or even a brief SIM card disconnection can cause this annoyance.
If you find yourself unexpectedly locked out of iMessage, try these troubleshooting steps to resolve the problem. Many users have successfully tackled similar issues with these methods, so you can trust that they’ll work for you too. Ensure a smoother iMessage experience by addressing these potential glitches promptly.
How to Fix this Error?
1. Restart Your iPhone:
Restarting your iPhone can fix a variety of errors, including the “iMessage is signed out” message, which is just one of them. It is effective almost all of the time. The steps are straightforward, although they may differ slightly depending on whatever iPhone model you have:
- A few words on the iPhone XR, iPhone X, iPhone 11, and other more recent models: Both pressing and holding the Volume button as well as the Lock/Side button will result in the same action being taken. Once you see the power slider, you can increase the volume by letting go of both buttons and sliding it to the left. To turn the device back on, fir,st ensure that it has been turned off for at least a minute and a half by waiting until the Apple logo appears on the screen before pressing and holding the Side button.
- The iPhone SE, the iPhone 8, and the iPhone 8 Plus are all affected by this. To do a restart, press and hold the Side button (or Top button, on older iPhones with smaller displays) until the power slider appears. This will bring up the option to restart the device. After releasing the button, you can then slide the switch to the left to turn off your iPhone. Continue pressing and holding the same Side button (or Top button, depending on your device) for at least thirty seconds, or until the Apple logo displays on the screen, whichever comes first.
2. Network Setting must be Reset:
Resetting your network settings on your iPhone is a straightforward process that ensures a clean slate for your connectivity. This won’t affect your personal data, but it will erase any Bluetooth and Wi-Fi credentials, VPN or proxy settings, and other network configurations you might have used. Here’s a simple guide to navigate through the process:
- Open your Settings menu.
- Tap on General.
- Scroll down and select Transfer or Reset.
Follow the on-screen instructions precisely to complete the network reset. Remember, this won’t alter your information, ensuring a hassle-free experience. Now, enjoy a refreshed network connection on your device!
3. iMessage server verification:
To identify if the problem is related to your Apple devices, start by checking the System Status page to ensure everything is functioning correctly. If there’s an issue with iMessage, you’ll notice a red exclamation point next to it, indicating a problem.
During this time, you won’t be able to send or receive messages with others until the server is back up and running. If everything appears normal on the System Status page, proceed to the next troubleshooting step to address any potential issues. This way, you can quickly diagnose and resolve any messaging issues on your Apple devices.
4. Reactivate eSIM or replace SIM:
If your mobile phone service is experiencing issues, it’s crucial to contact your service provider immediately. Whether it’s Verizon, AT&T, Mint Mobile, or another provider, reaching out to them is the first step in resolving the issue. For users with eSIM cards, reactivating the card may be necessary to regain access to mobile services. Contacting your mobile service provider for guidance on this process is recommended. Additionally, there’s a possibility that you may need to change your current cellular phone plan, and a factory reset on the eSIM card might be required.
If you’re using a regular SIM card, reaching out to your carrier is essential. They can provide you with a replacement SIM card if needed. Once the necessary steps, such as resetting network settings, are completed, you’re free to proceed to the next stage. To ensure a seamless experience, it’s advised to follow the instructions provided by your mobile service provider throughout this process.
5. Turn on and off iMessage:
• Open the option labeled Settings in order to access the Messages section.
• Ensure that the light that indicates you have iMessages is switched off.
• To turn it on, you need to hold down the switch for a brief period of time.
You need to make an effort to log in to iMessage right this moment. If you find that the problem is not resolved, you should move on to the next step. There is a chance that the problem is connected to the preferences that are associated with your Apple ID. Hence, you should examine it and, if necessary, reset it.
6. Check iPhone time and date:
- When you get to the Menu, go to the General section and pick that.
- To determine the time zone that is currently active on your device, navigate to the Settings menu and select the Date & Time option.
- To choose the “Set Automatically” option, you need just to flip the switch that is associated with that feature.
7. iPhone software update:
It’s no secret that bug fixes are a standard part of Apple’s iOS updates, as is the case with most software. That’s why you might not be able to use iMessage on an iPhone that hasn’t been updated recently.
- To access General, launch the iPhone’s settings menu.
- Choose “Update Software” from the menu. Have a look at the current state of any planned system upgrades.
- In the event that there is, go ahead and click the Install button. After the update is finished on your iPhone, it will automatically restart. All you have to do to check if the problem has been fixed is launch iMessage.
8. Get rid of old messages
If you’re facing difficulties signing out of iMessage, the culprit might be a problematic or stuck message. To troubleshoot this, consider deleting the most recent iMessage before attempting to sign out of your Apple ID. Clearing your entire message history may be necessary to ensure the resolution of the issue.
Worried about accidentally deleting important messages? Fear not, as FoneGeek iPhone Data Recovery comes to the rescue. This program can retrieve up to 35 types of data from your iOS device, including text messages, contacts, photos, and even WhatsApp chats. Compatible with all iOS devices, it seamlessly restores information from iTunes and iCloud backups. The process is straightforward and user-friendly, making data recovery a breeze.
- When you have downloaded FoneGeek iPhone Data Recovery, you will need to begin the installation process.
- After you have successfully linked your iPhone to the computer, you can begin the installation of the programme. Following that, choose the option that allows you to Recover from your iOS Device.
- After the new window has opened, choose Messages from the list of the different sorts of data that are available, and then click the Scan button.
- You will be able to access any and all messages, both those that are now on your iPhone and those that have been erased, once the application has completed its scan of your device.
- Choose the messages that you require, and once you have done so, click the “Recover” button to have them delivered to the address that you provide.
9. Change iPhone’s iMessage Region Setting:
Navigate to Settings Message if you want to alter the region. Tap your Apple ID under Send & Receive. To specify the place that is now active, go to Change Location, tap Region, and then click Save. Simply navigate to the Settings menu in order to accomplish this.
10. Contact Apple Support & Your Carrier
If you’ve tried everything else and your iPhone is still acting up, the next step is reaching out to your mobile phone provider. Check if there are any texting restrictions or issues on their end that might be causing the problem. If they confirm everything is fine, don’t worry – there’s still a solution. Reach out to Apple Support and share the steps you’ve already taken to troubleshoot the issue. They’ll guide you through additional troubleshooting or recommend the best course of action to get your iPhone back on track.
Final Thoughts
You should be able to fix the iMessage problem that states “you are not signed in.” You may do this by following the steps listed above. Let iMessage one full day to reload with the new settings, and then get in touch with Apple if you’re still having issues after that period of time. It is possible that it will take some time before the approaches to problem-solving become effective. Contact Apple Support if the issue is still present after the allotted amount of time has passed.